Openers · Aldershot
Photo-Eye Sensor Alignment or Replacement in Aldershot
The door will only go down while a finger stays on the wall button; let go and it stops or reverses. From the remote it opens fine but never closes, so someone has to stand in the garage every time.
Photo-Eye Sensor Alignment or Replacement
In plain words
Some sensor problems keep a schedule. A receiving eye that faces the low sun on winter mornings is flooded with light and loses the beam until the sun moves on, and a lens that frosts overnight in an unheated garage clears itself by noon. The service sorts these out for good: the sensors are swapped side to side so the receiver faces away from the light, or a small shade is fitted, and lenses and brackets are cleaned and reset above the line where slush collects. The door then closes at any hour of the day and in any month.
How the visit goesThe door will only go down while a finger stays on the wall button; let go and it stops or reverses. From the remote it opens fine but never closes, so someone has to stand in the garage every time.
Aldershot
How the visit goes
Starting with the story
The first minutes are spent listening. What does the door do when close is pressed: drop and bounce, stay put, or close only while the wall button is held? Does the opener light blink, and how many times? When did it start, and what changed around then: a car bumped the track, a storm, shelving went up, the garage was reorganised, the first frost arrived? Does it happen at all hours or only on bright mornings? Those answers usually point at one of a handful of causes before a single tool comes out, and they decide whether the technician heads for the brackets, the wire or the head unit first.
Bringing the pair back to the doorway
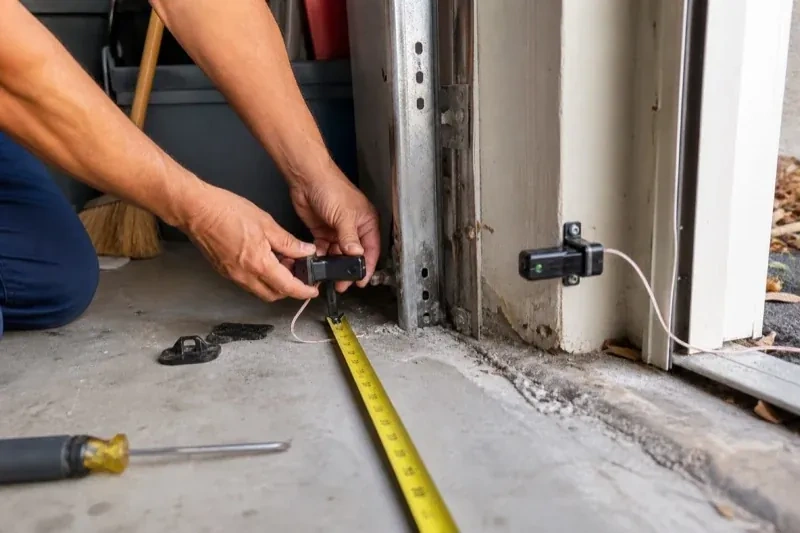
Sometimes the sensors exist but have been defeated: taped face to face next to the head unit so the circuit is always satisfied and the door closes on anything. The technician separates the pair, checks that both still work, and mounts them where they belong on each side of the opening, low to the floor and facing each other. New wire is run down each side, brackets are fitted, and the alignment is set. The opener is then made to prove itself with the beam test, and the household is shown why the pair matters and how to keep it working, so the shortcut is never tempting again.
The monthly beam test
The habit worth keeping takes about a minute. Once a month, with the door open, press close on the wall control and, as it moves down, pass a broom handle through the beam near the floor. The door should stop and climb back to fully open. Then lay a 2x4 flat under the middle of the door and close onto it; the door should touch it and reverse. If either test fails, stop using the opener; close the door first if it is not already closed, then use the manual release, and get help moving it by hand if it feels heavy or will not hold. A door that passes both tests is doing its job.
Photo-Eye Sensor Alignment or Replacement
In the van
- Wall or floor angle brackets
- Track-mount sensor brackets
- Concrete anchors
- Wing nuts and carriage bolts
- Matched photo-eye sensor pair
What affects the quote
Same fees day, night or weekend
1Door-side findings
A balance problem, a stiff roller or a bottom seal that needs replacing sometimes shows up during testing. Those belong to their own service and are noted and quoted separately rather than hidden in the sensor work.
2Wall or floor mounting with anchors
Mounting into concrete or masonry rather than onto the track means drilling, anchors and sealing against water, which takes more time than clipping to the rail.
3Type of kit
Some replacement kits contain only the two sensors with connectors, while others include brackets and a full length of wire. The kit that suits the opener and the state of the existing hardware is what is quoted.
Photo-Eye Sensor Alignment or Replacement: questions
How should I clean the lenses?
Gently, with a soft dry or lightly damp cloth, the way you would clean eyeglasses. Never scrape a lens or use a solvent, since a scratched or clouded lens scatters the beam. Wipe both sensors, then check that the receiving light comes on steadily. If a lens frosts on cold mornings, give it a few minutes to clear or dry it with a cloth. A quarterly wipe keeps dust, cobwebs and salt film from building up.
Is it all right to keep using the door until the visit?
Use the door in a way that keeps you in control. If the opener closes only while the wall button is held, do that only while you can see the whole doorway and nobody is near it. Otherwise close the door first if you can, then move it by hand with the manual release, and get help if it feels heavy or binds. Keep children and pets clear during any test. A door that reverses is being cautious on your behalf.
Can any sensor pair be used with my opener?
Not any, no. Sensors are matched to the opener's make and generation, and a board from one era may ignore sensors from another even when the wires fit. The technician reads the model from the head unit label and fits the pair listed for it. Some operators accept a documented universal pair, and those are used where the maker lists them as suitable; on a very old unit with no compatible pair, a modern operator is the way forward.
Openers & Access
- Chain-Drive Opener RepairHalfway up, the door lurches.
- Belt-Drive Opener RepairHalfway up, every single time, the door hesitates and there is a ratcheting sound from the motor…
- Garage Door Opener ReplacementThe remotes only work from the end of the driveway now, and one of them disappeared with a set of…
Photo-Eye Sensor Alignment or Replacement near you
The list below is what a garage door technician in Aldershot actually does in a week: replaces springs and cables, resets doors that jumped the track, fixes and replaces openers, programs remotes and keypads, changes seals and rollers, tunes and balances doors, and installs new ones.